Warrior Positions In Yoga For Beginners: Transform Your Balance And Alignment
Did you know that the warrior positions in yoga help you to improve your balance, build up strength, and increase flexibility? You are missing out on something in your life if you do not know these poses! In this article, I will show you how to modify them and use props so that you can practice them effortlessly while still gaining the benefits of the poses.
Hatha Yoga has three types of warrior positions which are Warrior Pose 1 (Virabhadrasana 1), Warrior Pose 2 (Virabhadrasana 2), and Warrior Pose 3 (Virabhadrasana 3). I’ve explained the ins and outs of Warrior Pose 1, Warrior Pose 2 and Warrior Pose 3 in my past blog posts, so please read through them if you are a beginner or would like to refresh your memory.
Warrior Positions In Yoga: How To Use A Chair For Stability In Warrior 1
Warrior 1 is one of the warrior positions in yoga that excellently lengthens your spine, increases knee flexibility, and strengthens your thighs. If your hamstrings are tight, your pelvis will be pulled backward, resulting in an overly rounded lumbar spine1. However, using a chair allows you to focus more on the hamstrings of your back leg, making it easier to straighten your spine.
Modification without Props
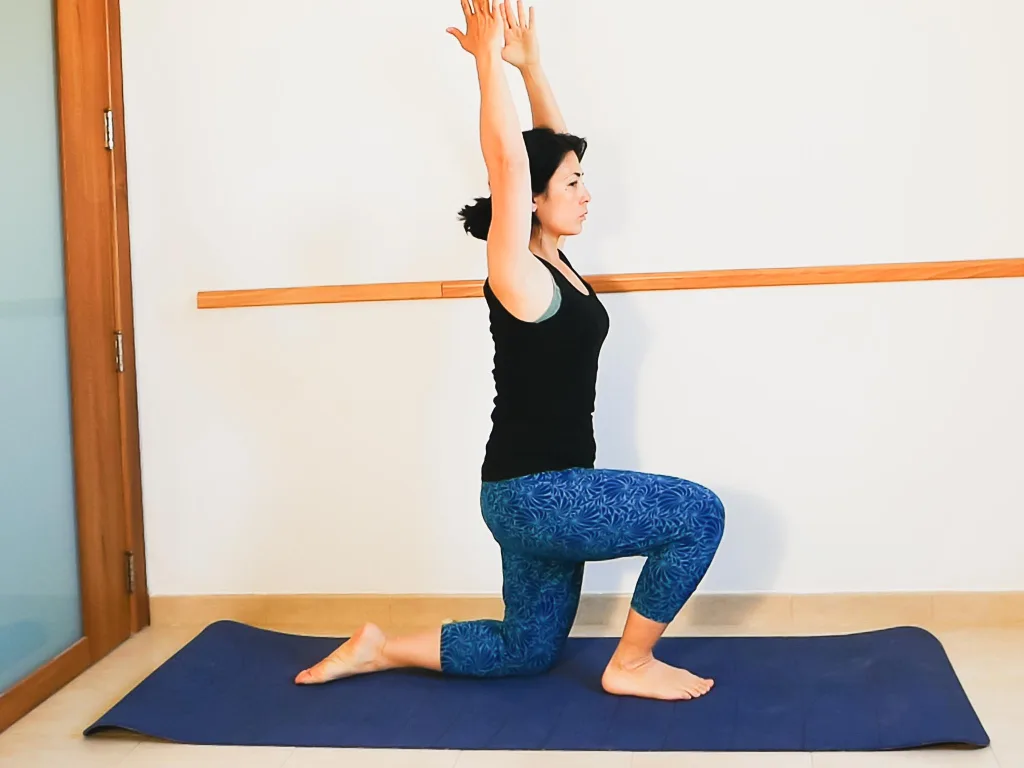
This modification doesn’t strengthen and stretch your legs, but is still effective for your spine. Bend your right leg and extend your left leg as far back as possible, keeping your hips parallel to the front. Stretch your arms to the ceiling and look forward. Keep the pose for 30 seconds then repeat it on the other side.
Modification with Props
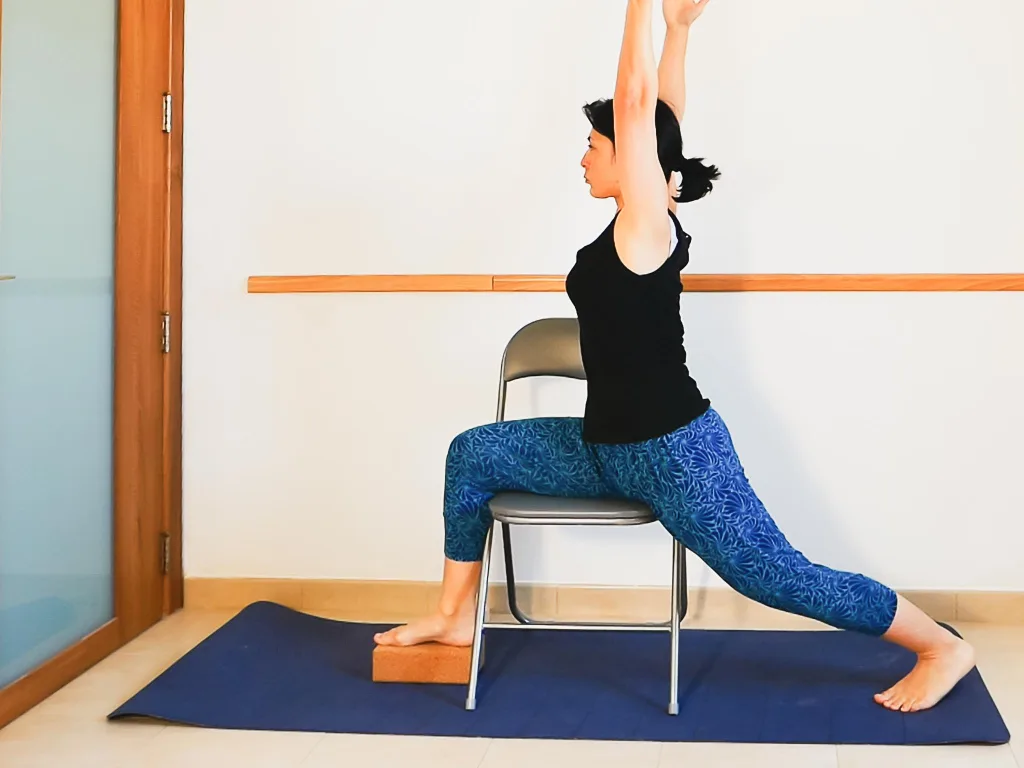
This version uses a chair. For beginners it is quite a challenge to engage both legs equally, but a chair will do wonders. You can gain all the benefits that Warrior 1 provides.
First, place a chair sideways to your yoga mat. Rest your right thigh on the chair’s seat with your right foot on the floor. If the edges feel uncomfortable on your right thigh, you can put a blanket on the seat. If your right foot does not reach the floor, place a yoga block or something else under it for stability. Position your left leg to the back.
Next, turn your upper body to the front. Lift your hands to the ceiling and stretch your spine. Be aware of both legs and push the feet into the floor. The hips have to be also parallel to the front.
In this modification you will feel that not only the front leg but also the back leg is fully engaged, which is a very important point to note. After 30 seconds, release and repeat on the other side.
Warrior Positions In Yoga: Controlling Balance With A Chair And A Belt In Warrior 2
Warrior 2 shares the same benefits of Warrior 1 with the added benefit of stretching your hip joint even more. One of the causes of back pain are tight hip joints2, so nothing holds you back not to try this exciting pose!
Modification without Props
In this version, you keep your hands on your hips. This variation will strengthen and stretch your legs. To further strengthen your legs and also feel the stretch between your shoulder blades and arms, try the pose with props.
Modification with Props
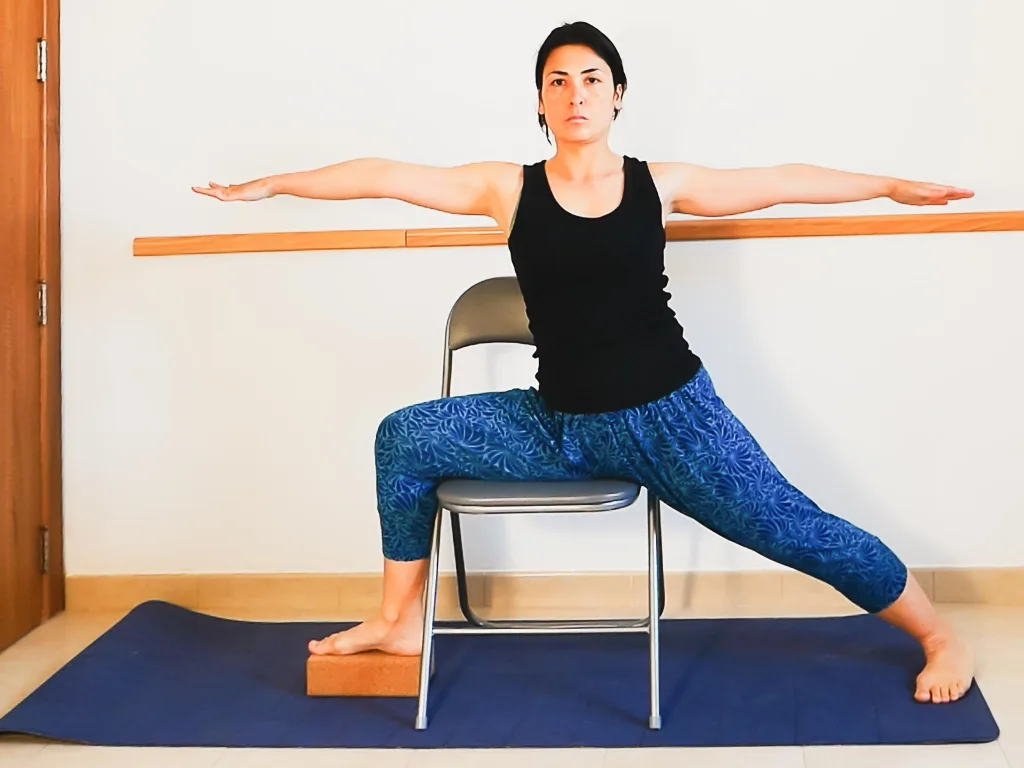
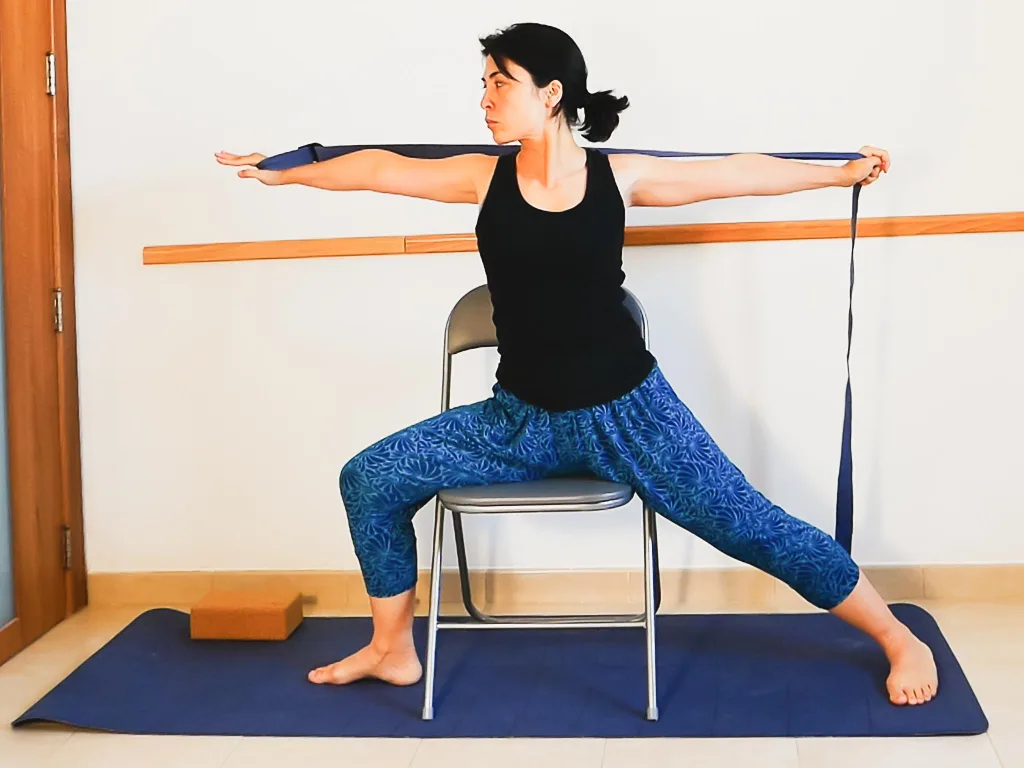
Again, get a chair and a yoga belt. Similar to Warrior 1, for beginners it is not easy for beginners to engage both legs. Plus, in Warrior 2 you have to stretch out your arms to the side which makes it even harder to keep the balance. However, there is no need to despair – a chair and a yoga belt will help you to get the most out of the pose.
Place your chair sideways. Fold your yoga mat two times and put it on the seat to avoid any uncomfortable sensations on your thighs. Make a small loop at one end of the belt, large enough to fit your hand through.
Put your right thigh on the seat. Place your right foot to the front with toes pointing forward. If you cannot reach the floor, put a yoga brick under your right foot. Place your left leg behind you. Rest your hands on your hips.
Grasp the yoga belt and put your right hand through the loop. Turn your torso sideways so that it is parallel to the side. Look forward. Stretch out your arms and put the belt on your shoulders. Grab the other end with your left hand and spread your arms as wide as possible. The belt helps to keep the stretch of your arms.
Warrior Positions In Yoga: Superior Balance With The Wall In Warrior 3
The main challenge in Warrior 3 is to keep your arms and legs parallel to the floor. However, it is one of the best warrior positions in yoga building up the strength of your back muscles. Give it a try!
Modification without Props
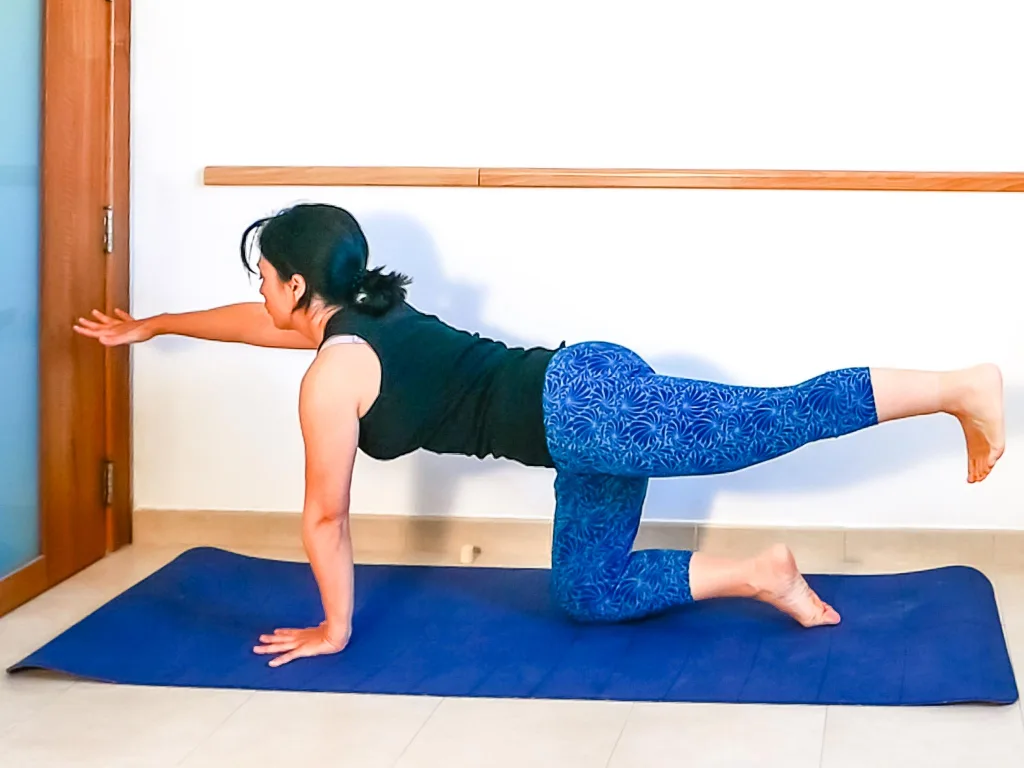
The modification without props is a milder version of the pose. Kneel down on your yoga mat and put your right arm on the floor. It has to be in one line with your right shoulder. Extend your left arm to the front and your right leg to the back keeping them parallel to the floor. The pelvis will tend to tilt to the left, but keep it parallel to avoid back problems later. Hold the pose for 30 seconds and then switch sides.
Modification with Props
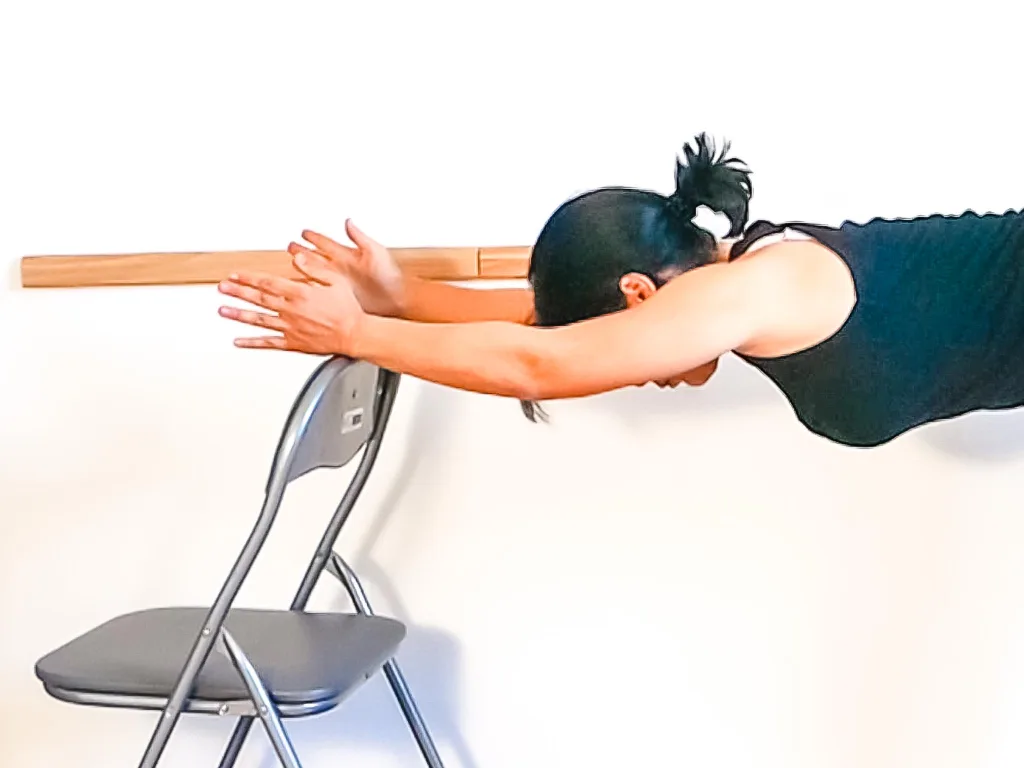
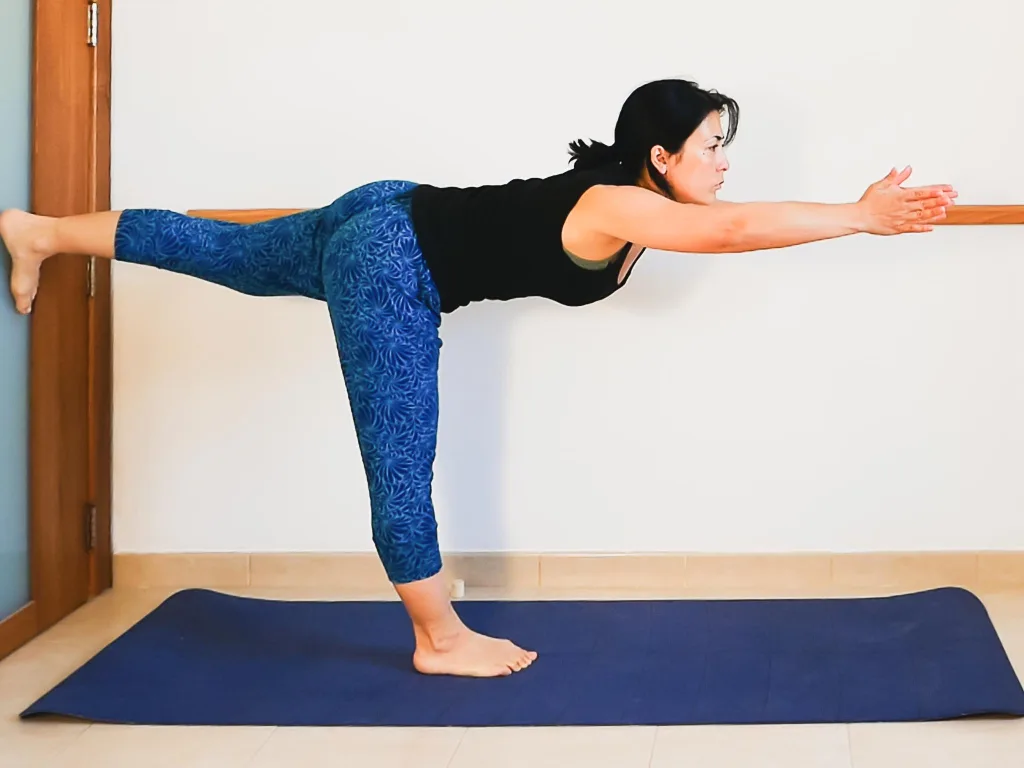
A chair or a wall is useful for this modification. You can use the wall to support your back leg. When lifting your right leg, put the sole of your foot against the wall with toes facing to the floor.
Another modification is to use the back of a chair. You can put your arms on the backrest as you lift your back leg.
I hope this article helps you to achieve better balance and alignment in the three warrior poses. If you have any comments, please feel free to share them.
Reference

Comments